Gluten-Free White Sauce

photo

I’ve been looking at a bag of brown rice flour in the cupboard for ages (with pauses to go to work, watch TV, go to sleep etc.)  and wondering if t would be possible to make a decent white sauce with it.  Having suffered the indignity of having to pretend to enjoy cauliflower cheese  made with dairy free cheese sauce mix (just because it’s fake, does it really have to taste like it?) and having half a cauliflower left, I thought about how much better I might be able to do.

Classic white sauce involves butter, flour and milk – this one follows the same principles but uses oil, rice flour and water, although if I was making it for someone else then I’d make it more creamy with soya or nut milk or nut cream.

  1. Heat up a tablespoon of oil and mix in a heaped tablespoon of brown rice flour
  2. Stir well over a medium heat till the flour is bubbling, cook for a few minutes taking care not to let it burn
  3. Pour on hot stock, a ladleful at a time (check the stock you’re using is also gluten-free)
  4. Bring to the boil then simmer, sauce should thicken – when it can coat the back of a spoon, it’s done

I’ve added fresh dill but for a cheesy sauce you could add ketchup, marmite and yeast flakes or vegan cheese to taste.
To make an onion sauce, start by frying onions in the flour then proceed with adding rice flour.


How to survive preparing Globe Artichoke

IMG_0155

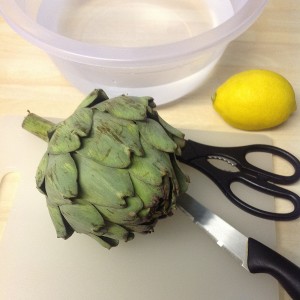
Globe artichoke, not to be confused with Jerusalem or any other type of artichoke, is a small, alien being that will fight you every step of the way as you attempt to dismember it.  At the end of this grueling and painful process, once you are covered in plasters and committed to never ever bothering again, you are rewarded with dinner that tastes like heaven and you may do a quick about-turn, decide the preparation wasn’t so bad after all and then wonder how soon you can go out to buy another one.

Knowing what to do and in what order can help a lot when tackling one of these beings.  I hope the explanation below will be of assistance.

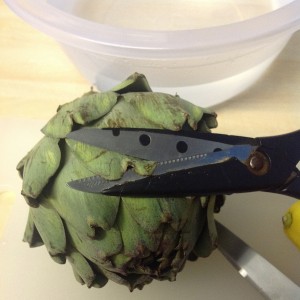
IMG_0156 Holding the artichoke by the stalk, use the scissors to chop the spiky ends off the leaves leaving them cut flat across – imagine you’re cutting toenails.  When the leaves get smaller near the top of the artichoke, ignore those because you’re going to cut the pointy end off anyway.
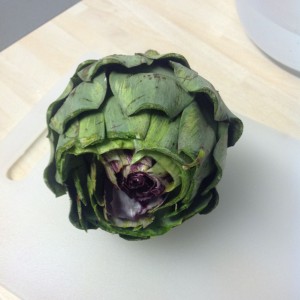
IMG_0157 Chop the pointed end off completely; this should reveal a centre with purple leaves.  You’ll need to pull all of these leaves out, which is tricky because they’re stuck in with superglue and have spikes that want to hurt your fingers.  Maybe bet someone they can’t get them out in under a minute … “Your minute’s not up yet…. no, not now either, keep going!”
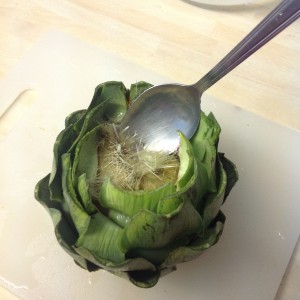
IMG_0159 Your next challenge, hiding underneath the purple leaves is a load of spiky hair, which you can dig out by being vigorous with a metal spoon.  Remember to scrape it all off – it’s not edible.
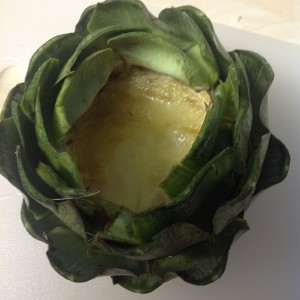
IMG_0160 Stop digging when you hit hard ground – you have reached the heart of the artichoke.  It gets a lot easier from here.
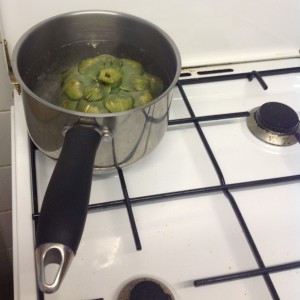
IMG_0161 Place artichoke into a large pan of boiling water with a squeeze of lemon.  If you’re looking to save water, boil it in the same water you used to prevent it from browning.  Boil for about 35 minutes.  When you’re done, the water will have turned dark green – no need to be alarmed.

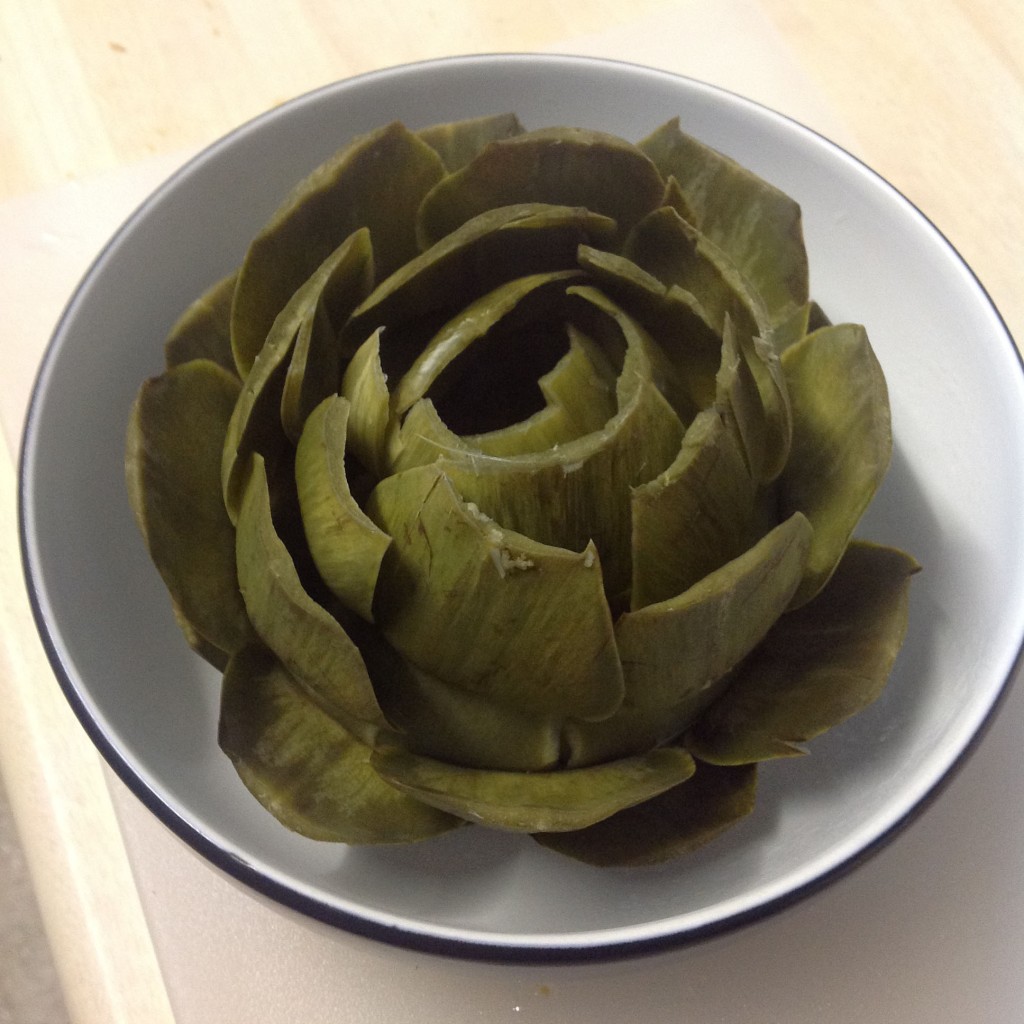
Drain upside down and serve drizzled with oil or with vegan spread / butter or margarine equivalent.
Eat by peeling off outer leaves, dipping into whatever you’ve put in the centre and then stripping the leaves with your teeth.  You can eat the heart as well – if you’ve prepared and  cooked it, you deserve the best bit.

IMG_0162

Vegetable Burgers

IMG_0154 Trish's veggie burgers

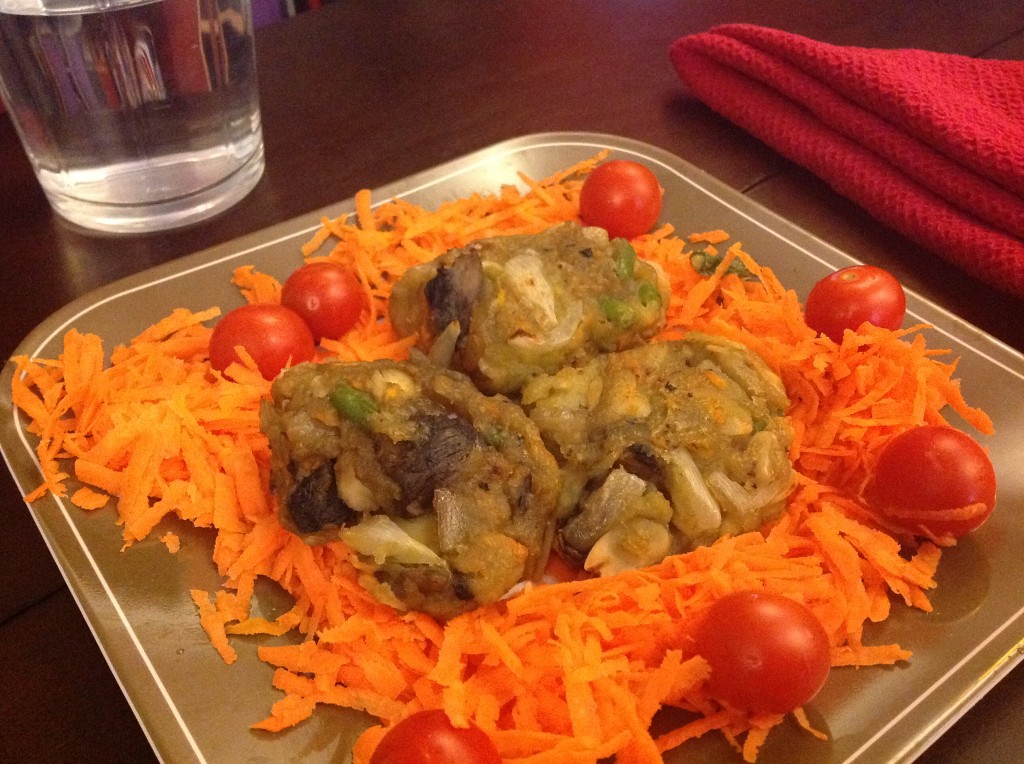
I wanted to make something like the vegetable grills, burgers and fingers you can buy frozen in supermarkets but without the coating, which is my least favourite bit.   This recipe makes about 6-8 burgers depending on how big you make them.  Warning! They do fall apart quite easily – and that’s because there’s no chemical weird stuff holding them together, just love.

  • Couple of small potatoes or 1 big one
  • Vegan butter equivalent (or whatever you usually mash your potatoes with will do)
  • 1 carrot
  • Green beans (I mean small ones like these)
  • Handful of mushrooms
  • 1 onion
  • Almond flakes or other nuts of choice, chopped
  • Very small amount of marmite (optional)
  • Oil for coating / frying
  1. Boil potatoes ready for mashing
  2. Meanwhile chop green beans into small bits, cook and set aside
  3. Grate carrot
  4. Fry onion and mushroom in a little oil
  5. Mix all ingredients together in pan with wooden spoon till well and truly smushed up together then leave to cool
  6. When cool, wash your hands and shape mixture into burger (or sausage) shapes
  7. Brush with oil and grill or fry

Butternut Squash Soup

IMG_0143 Trish's Butternut Squash Soup with Red Pepper

  1. Peel and chop 1 butternut squash and chop 1 red pepper roughly, discarding seeds
  2. Place in a bowl and drizzle on olive oil, use a wooden spoon to stir the veg around in the oil to coat it lightly
  3. Transfer to a roasting tin and place in oven preheated to Gas Mark 6 / 200° C
  4. Peel 4 garlic cloves and add them to the roasting tin when the squash and pepper have been cooking for 10 minutes
  5. When the squash is soft, remove tin from oven
  6. Blend cooked veg with enough vegetable stock to make soup consistency
  7. Add agave nectar and dried chilli flakes to taste

Dill pancakes with broccoli, mushroom and kidney bean filling

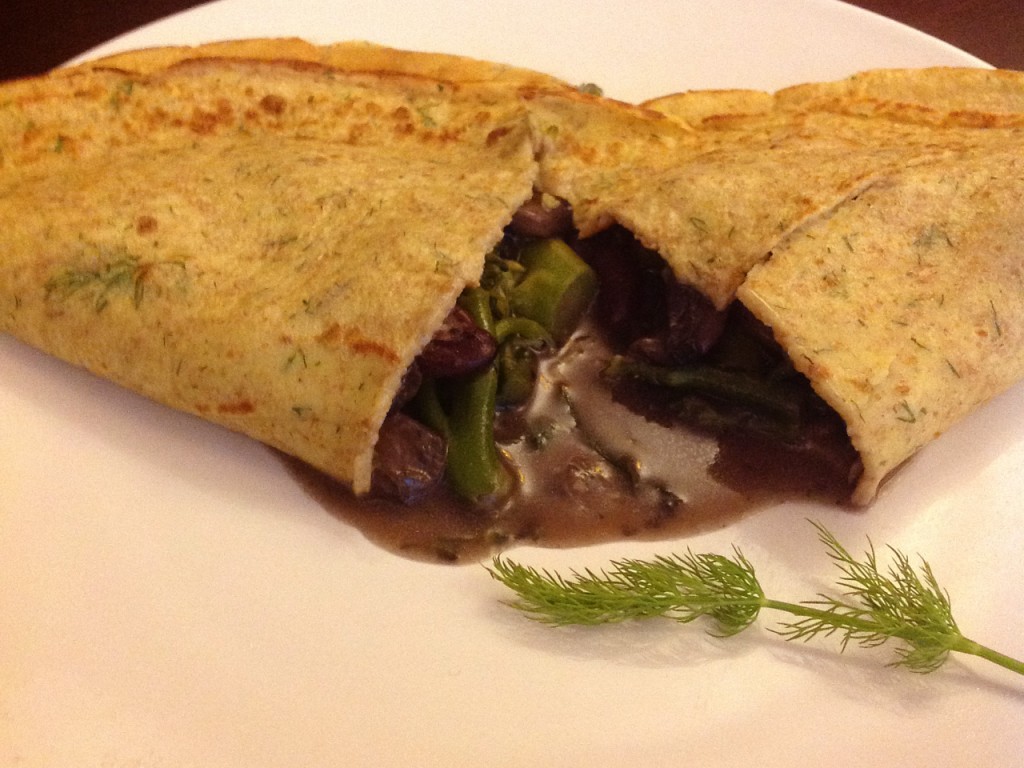
IMG_0126 Pancakes

At The Tea House, we are currently of the opinion that the above dish could do with being renamed; not due to any current inaccuracy but because it takes a long time to say and we’re lazy.  Besides, when you’re hungry and asking the waiting staff what today’s specials are, you don’t want to listen to your own stomach grumble through endless descriptions of “a subtle yet racy tarte aux oignons with a hint of chillies, slathered in a gentle cornichon sauce”; you want to hear “Pie, Lasagne or jacket potato?” to which you say “Jacket potato with what?” … “Beans or cheese” …. “I’ll have the beans”.  Job done.

Anyone who makes this recipe has my permission to call it ‘Pancakes with savoury filling’ (I chose not to just in case I make something similar, but not identical, on another occasion).  You also have my permission to pretend to your friends that you invented it – I shall take it as a compliment.

The dill works really well in the pancake batter and the kidney beans give a semi-sweet kick against the backdrop of meaty mushrooms and sharp Tenderstem broccoli.  Alternatively, “mmmmmmmm”.

Pancake batter

Vegan

  • 3 heaped tablespoons plain flour
  • 1 teaspoon soya flour
  • 2/3 pint of soya milk
  • salt
  • Finely chopped fresh dill

Veggie

  • 2 eggs
  • 1/2 pint of milk
  • 4oz / 115g plain flour
  • salt
  • Finely chopped fresh dill

You’ll also need some butter or oil for frying the pancakes

Filling

  • Tenderstem broccoli (about half a pack)
  • Mushrooms (one large or a handful of regular mushrooms per person)
  • Garlic (lots, obviously)
  • Red kidney beans (about one tablespoon per person)
  • Oil for frying
  • Handful of plain flour
  • Vegetable stock
  • Balsamic vinegar
  • Agave nectar (optional)
  • Coconut milk or cream (dairy or plant-based equivalent)
  1. Start by making the pancake batter.  Blend all ingredients in a blender and leave it to one side while you get on with making the filling.
  2. Steam the broccoli for 5 minutes and put to one side.
  3. Fry the mushrooms then add garlic when they get to the point where they’re leaking mushroom juice.  Fry a bit longer to start the garlic cooking.
  4. Throw on some flour and stir it in, keeping the  pan on the heat.
  5. When you can no longer visually identify the flour, add enough stock to almost cover the mushrooms and let it simmer.
  6. Add some balsamic vinegar to taste
  7. Add kidney beans and cooked broccoli
  8. Add agave nectar to help bring out the sweetness of the kidney beans – if you don’ like your savouries too sweet then you can happily skip this step
  9. Add coconut milk or cream, how much depends on desired consistency
  10. Leave pan on a very low heat while you start cooking the pancakes
  11. Heat oil or butter in a frying pan – hot butter will sizzle and hot oil will smoke a bit.
  12. Pour some of your pancake mixture into the centre of the frying pan and move the pan to swirl the mixture around.  Your pancake will begin to solidify quite quickly so start shaking the pan when that happens in order to loosen it so you can toss it over and cook the other side.  If it’s particularly recalcitrant, try levering up the edges of the pancake with a suitable cooking implement.
  13. Now you’re ready to toss IF you are one of these supremely confident people who doesn’t drop four out of five pancakes they try this with.  An alternative is to get a wide spatula and work it under the pancake so you can flip it over without risk to your ceiling, floor or patience. You may want to flip a few times to get it cooked to your requirements.
  14. Place pancake on a plate and spoon some of the filling into the middle then fold the pancake over it.
  15. Serve and enjoy!

Gazpacho

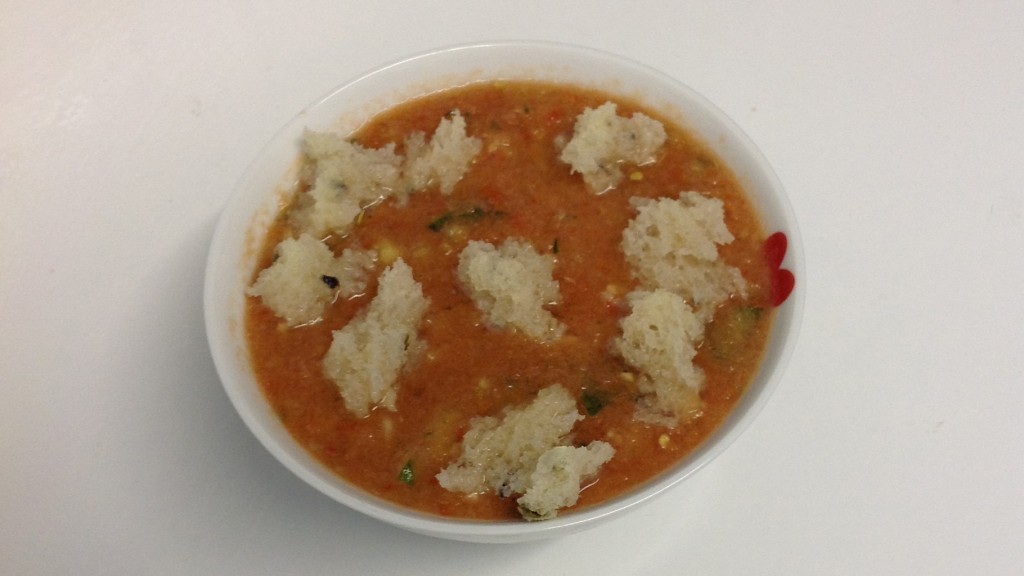
gazpacho

We just spent a long, hot day at the Foodies festival in Battersea courtesy of our lovely neighbours who gave us tickets.  Being there was pretty awesome, loads to try and loads to buy; we also learned, for example, that Ginger Ale is weaker because it’s made with ginger oil but Ginger Beer (which we bought some of) is stronger because it’s made from ginger root.  We came home with full stomachs, some bread and FREE Tenderstem broccoli that I’ll make something with tomorrow.

When it got to eating time again, I felt too hot and sticky to cook let alone eat anything warm so I knocked up this gazpacho and threw some of our Foodies festival bread on top of it.  For anyone not yet aware, gazpacho is cold soup and is vitamintastic!

  • 1 red pepper
  • 1 beef tomato OR 3 regular tomatoes OR a full handful of cherry tomatoes
  • About 1/3 cucumber
  • 2 cloves garlic
  • Chilled water
  • You can add olive oil but I prefer not to
  • You can also add onions – ditto
  1. Chop and blend the pepper, tomato and garlic
  2. Chop the cucumber very finely
  3. Mix and add chilled water to taste

Oat Bread

IMG_0015 Oat Bread

My friend Neil invented this in the late 1980’s when we were impoverished students.  It’s a very cheap bread that can be served with curries and stews.  It’s high in fat so I wouldn’t call it healthy.  Picture above shows oat bread giving some Tesco Falafel Balls a cuddle while some salad looks on and tries to join in.  Ideally there would also be houmous but we’ve run out – blame Morrisons for closing at 6pm!

Recipe is very easy – mix equal quantities of oats and flour then add a pinch of salt and enough water to make dough, then roll it out into a thin circle and fry it.

Neil, if you’re reading this and I have any part of the equation wrong, please do let me know 🙂

Garlic and Chilli Tofu

Tofu Cubes IMG_0010

Garlic and chilli tofu, sometimes and more honestly called ‘Garlic, Salt and Chilli tofu’, is a lovely dish when prepared and served in Vietnamese restaurants.  An even golden crispy layer coats soft, garlicky tofu almost lovingly and slivers of red chilli that look like they’ve been polished nestle among the accompanying crispy salad and glistening onions.  If it doesn’t come with sweet chilli sauce or similar for dipping then you can almost certainly ask for it.

At The Tea House we have currently run out of sweet chilli sauce and our home-made version of garlic and chilli tofu may not be as perfect as the real deal, but it still gets devoured pretty quick …making your lips tingle all the way.

  • 1/2 a block to a block of tofu, depending on how many people you have to feed
  • 1/2 – 1 cup of plain flour
  • 1/2 – 1 tablespoon salt
  • Teaspoon of dried chillies (or cut up a fresh chilli if you’re brave – I recommend wearing latex or vinyl gloves for this)
  • 3-4 cloves of garlic
  • Oil for frying (preferably something neutral like sunflower or rapeseed)
  1. Cut the tofu up into cubes
  2. Crush the garlic and squish it into the tofu cubes with a spoon OR shake both things in a bag or bowl together
  3. In a separate bowl mix the flour, salt and chillies
  4. Roll each cube of tofu in the flour mixture and transfer to a plate
  5. Heat oil in pan and fry cubes lightly on all sides
  6. Transfer to oven on a warm heat while you make your main course
  7. Serve with sweet chilli sauce, if you have any 🙂

Stuffed Peppers

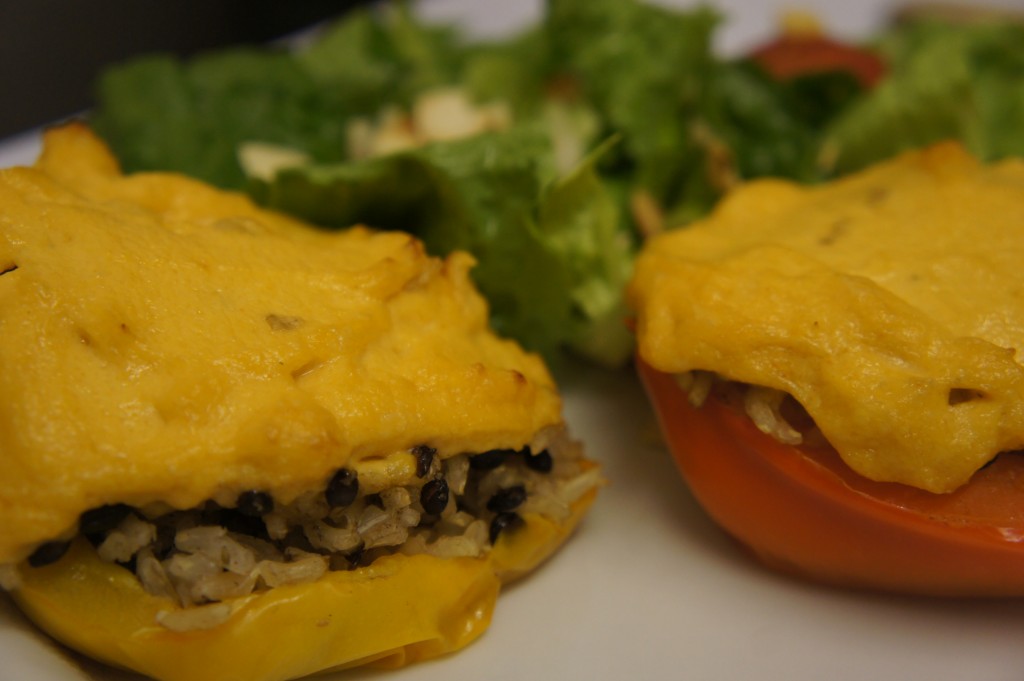
SONY DSC

I can claim very little of this as my own recipe.  The basic stuffed peppers concept and how to cook them properly was told to me by a passing shopper in a supermarket in the South of France, the vegan cheese topping recipe is from the internet (recreated here by me because I can’t find the original), the puy lentils were pre-cooked and packaged by Merchant Gourmet (what, me, lazy?) and the rice is Sainsbury’s Boil-in-the-Bag.  I totally invented the salad, just so you know – for the record nobody thought of pairing lettuce and tomato until I showed up.

  • 3-4 peppers – whatever colour you like
  • 1 bag of boil-in-the-bag rice – ditto (for people who can actually cook rice, this is equivalent to about 125g)
  • About a quarter of a packet of ready-to-eat puy lentils
  • As much garlic as you can stand, crushed
  • Half a teaspoon to a teaspoon of olive oil
  • Pinch of dried, mixed herbs or teaspoon of fresh herbs of choice
  • Pinch of salt or stock powder

Vegan “cheese” topping

  • Half a cup of soya milk
  • Half a cup of olive oil
  • Juice of half a lemon
  • 1-2 tablespoons of tomato ketchup
  • 2 tablespoons potato flakes (Supermarket’s own cheapo version of ‘Smash’, on no account attempt to make mashed potato with it); if your supermarket doesn’t have these, you can get just as good results by using potato flour
  • 1 teaspoon veggie stock powder (I use this one)
  • 1/2 teaspoon marmite
  1. Chop peppers in half lengthways, remove the seeds and the green stalk
  2. Boil for 5 minutes to soften then place to one side
  3. Cook rice according to instructions
  4. Mix rice, puy lentils and garlic together, add herbs and a very small amount of olive oil
  5. Place each half of pepper on a sheet of baking foil that will be enough to wrap completely around it when it is stuffed
  6. Put about a tablespoon and a half of rice and lentil mixture into each half of pepper and wrap them up
  7. Place your foil parcels on a baking tray in an oven set to 200°C/Gas Mark 6 and leave them to bake while you make the ‘cheese’ topping – check them after about 20 minutes though
  8. Pour the soya milk into a small pan with about 1/4 of a teaspoon of the stock powder and heat gently
  9. Pour the olive oil into a suitable receptacle for mixing with a hand-held blender (don’t use a proper blender unless you really love dismantling it and washing it up) – add the lemon juice
  10. When the soya milk is threatening to bubble, pour it into the container with the oil and blend together – it will look like mayonnaise
  11. Add all the other ingredients and blend thoroughly – it should look like cheese dip
  12. When the peppers are ready (usually about 20 mins or just under) take them out and unwrap them.  Spread your ‘cheese’ mixture on top of each one and return to the oven until the topping is bubbling and just starting to brown.  Actual cheese from a cow can be used as a substitute if you’re someone who eats dairy – pick something that enjoys melting.

On this occasion, the salad was made up of romaine lettuce, cherry tomatoes, spring onions (green onions) and toasted almond flakes.

Please do gather to applaud the excellent photographic skills of my lovely neighbour, who sent me a selection of photos to choose from – all of them awesome.

Mushroom soup

Mushroom Soup

One of us being a person who used to eat dairy but who now doesn’t, the Tea House menu sometimes features dishes that are classic dairy feasts but which have been reinvented so as not to incorporate regular milk or cheese.  Tonight, mushroom soup was created; it’s for lunch tomorrow but we’ve had a teaspoon each to try it and it definitely ‘works’ despite being a little more like the mushroom soup you get served as a starter in Thai restaurants and a little less like the canned Heinz stuff.  The mushrooms in the picture above looked green by the way, until Peter undid the damage I’d done by trying to use Photoshop.  By request I’m attempting to include approximate amounts for all ingredients used.

  • Mushrooms of choice (about 200g)
  • 1 tsp olive oil
  • Up to 4 cloves garlic
  • Enough veggie stock to cover
  • Up to half a can of coconut milk (I’m practically crying that the brand I bought contains sulfites but have discovered that you can make your own)
  • Dried chilli flakes (amount to vary from none to loads according to preference – use fresh chillies if you can be bothered)
  1. Fry mushrooms in oil until they start releasing liquid, then throw chopped or crushed garlic in and fry for another half a minute
  2. Scatter in chilli flakes
  3. Pour on veggie stock and let simmer
  4. Add coconut milk
  5. Taste, add any other things you think will work – I threw a bay leaf in but not sure it did much to change the taste